Friday 31 March 2017

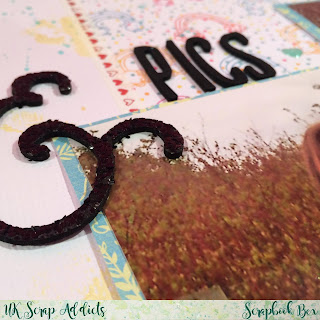
Pics, Pics & More Pics | Scrapbook Bex | Multiple Photos


Hey Scrappers!!  Scrapbook Bex here today to share with you my layout for the theme of multiple photos.


For this challenge I decided to use two photos very slightly trimmed down from 6x4".


I have gotten out of the habit of using multiple photos on layouts as the trend has seemed to be on single photo pages. It was nice to revisit this process.


I wanted to show that multi photo pages don't have to mean lots of smaller photos, that larger photos in a more regular print size work just as well.


I hope you'll visit our YouTube channel to see a process video showing how this layout came together.


Until next time,
Scrapbook Bex

Thursday 30 March 2017

One Crazy Bunch | Jackie Ashton | Multiple Photos

Hi, Jackie here for my first blog post for this site.  The theme this month was to use multiple photographs on a single layout, and I knew just which ones I was going to use.

I recently went on a craft retreat with some of my crafting friends, and to start our fun weekend off, we met for lunch and some shopping and of course we had to take a couple of silly selfies or two, and which as you can see from the photographs was hilarious, but we ended up with these fun photographs which just had to be scrapped.


I used Simple Stories - Emoji Love collection, which was just perfect for these fun selfies.

The collection is a fun and very easy to adapt for all types of photographs and has a large selection of chipboard, word stickers and phrases that captured the fun in the photographs.


I made the photo strip by printing the photos size 2 inch by 1.5 inches, which I printed on my Selphy, printing 4 on a 6x4 photo print.  Then I cut them into 4 and struck them onto white cardstock to represent a photo strip.  These I then layered on several strips of patterned papers.

The main photograph is printed as a 4x4 square and layered on a piece of patterned paper, which I then 3D mounted before adding it to the right-hand side of the background paper.

I added some of the chipboard phases to the top and bottom of the photo-strip, as well as some word and phrases stickers.


To add some more detail and texture, I machined stitched over the title, which not only held the letters in place but it just added an extra detail to the page.


I finished the layout by adding some enamel dots and flair badges that I had in the stash.

I hope you get some inspiration from my layout on adding multiple photographs to your scrapbooking pages.


Wednesday 29 March 2017

Week 9 I Sarah Toward I Multi-Photo Layout

Hi there.

I'm super excited to be here with you today to share my take on a Multi-Photo layout.  To be fair I've got it easy as I'm a Pocket Page scrapper which by nature is all about multi photos.  But I want to share with you how I squeeze in as many photos as possible, only using one page protector.


One way I include more photos is to do photo collages.  I usually do these using the PicFrame app on my iPhone and use my Canon Selphy to print them out.  You can see that I've used photo collages for four of the photos on my Week 9 pocket page layout.  However one of the days this week was a particularly busy one and I took far too many photographs and couldn't choose just one to use.


Step in my Photo Fuse Tool, and two 4x6" photo collages. 


The Fuse tool allows you to adhere a clear photo sleeve to your page protector and enables you to insert more photos onto your layout.  


The extra pocket has enabled me to fit two extra photo collages in and I have been able to use more photos from a very photo heavy day without missing any out.


Of course if you haven't got a Fuse Tool and sleeves you could always attach a photo with a bit of washi-tape on the top edge acting as a hinge. 


For my Week 9 pocket page layout I used papers from the Crate Paper, Chasing Dreams collection, some puffy stickers from Paperchase, alpha stickers from Hobby Craft and created some extra embellishments on my Silhouette Portrait.  Anything else has been dug out of my stash.

Pocket Page scrapping really is my favourite way of memory keeping.  I hope that I have given you some ideas for including even more photos in your Pocket Pages.

Thanks so much for stopping by today and checking out my first Creative Team post.  Please keep coming back to see what this wonderful UK scrap team are up to.

Hugs
Sarah xoxo


Tuesday 28 March 2017

Pamper & Plan I Michelle Mills I Multiple Photo Layout

Hello my lovelies, where do I start?  First of all, I am so excited to be here and part of this team, I have only been scrapbooking for a year or so and I wish that UK Scrap Addicts had been around when I started.


For this months layout, Multiple Photos, I used some pictures from a recent event that I hosted which I wanted to document and a recent Studio Calico kit.  My focal point was that lovely emerald green which appears on the main backing paper and that I highlighted by framing the photos with. 


I must admit that for multi-photo layouts I usually pop them in a pocket page layout but this was so much fun that I will definitely try it again.  I love to use mixed media, so to break up the white space and inject a bit of that lush green I used a stamp pad and some bubble wrap to create a pattern on the 12x12 cardstock before placing my designer papers. Then, by cutting up the journaling cards from the same kit as the papers, I balanced the top and bottom layers out.


Monday 27 March 2017

Surprise | Jess Claire | Multiple Photos


Using multiple photos comes so naturally to me as a pocket scrapbooker.  I have been scrapping for over 3 years and I started by discovering Project Life and I am still very much loyal to pockets.  I do weekly Project Life so each spread (Single or double page) has multiple photos and those photos are my starting point.

This week I knew I wanted to include this photo of some daffodils my mum brought for me so I thought about what card kits I had that had yellow in.  I decided to use the Project Life Super Cute Value Kit for those spring like pastel colours, and because I knew they would match the enamel dots that I am currently obsessed with. 
I used other cards to back photos on and rounded all the corners for a co-ordinating feel.  When I first started scrapbooking I rounded the corners of everything.  Recently I have been feeling that pull again to have rounded corners on my layouts.


I fussy cut some hearts out of matching papers and used some cream and gold phrase strips to make embellishments. I then added those beautiful enamel dots in a triangle formation, I used them sparsely because I don't have many left and I quite like the look of them on their own.

In terms of journaling I used one card to tell the story of how dying my hair actually had some effect for once – Dark hair does not dye well – and used another card to jot down some bullet journal style points to sum up the week and the photos on my page.  You’ll notice that I only very briefly mentioned Ben’s birthday party – yeah that needs its own multi-page spread, I just wanted to feature it in a small way in my weekly roundup.

For the title card I fussy cut the pink speech bubble, the yellow flower and a strip of paper from other 4x6 cards in the kit (I have way more 4x6 cards left and I’m running out of 3x4s).  I started off with the alphas on the banner shape I cut but it didn’t seem enough and they got a bit lost on the patterned paper.  I spent a long time moving things around but I am happy with the final product.  I also used a large acrylic word from an old Ali Edwards kit ‘Surprise’ and I like how it goes with the stories and photos in the layout.

Sunday 26 March 2017

Guest Designer - StickerKitten

Today we welcome our final guest designer for March - meet Sarah aka StickerKitten...

My name is Sarah Douglas aka StickerKitten and I live in Berkshire with my husband James. I started crafting five years ago and I mostly make cards but recently I have been trying out Project Life and scrapbook pages. You can find out more about me on my website www.stickerkitten.co.uk or on social media:

For this layout I've used my new StickerKitten Bee Garden paper pack and stamps (which will be available on my online shop from mid-April).


To begin I tore strips of honeycomb watercolour patterned paper (using a ruler to achieve a neat edge) and created a border.  I then layered a sheet of kraft honeycomb paper and pink striped paper with my photo matted on to sky blue paper.  These pics were taken on a lovely day by the seaside with our friends on a holiday in Devon.  I cut the photo and mat with Lawn Fawn stitched square dies, and it cut off a little boat so I added it back in on the side!


For the next photo I matted it onto leaf patterned paper and rounded the edges.  I stamped two polka dot washi tape strips from my Bee Garden stamp set and adhered them to the top and bottom to look like strips of tape holding it on.


To finish I added some small cut out watercolour hexagons, a large stamped floral hexagon, die cut clouds and a title using foam stickers.  I added my journaling to a spare bit of kraft card and attached it below the photo.

Huge thanks to Sarah - and we'll keep you updated on this paper collection :)

Saturday 25 March 2017

Photobooth Mayhem | Laura Jane Thomson | Multiple Photos

Hello fellow scrapbookers!  How are you all?  I’m Laura Jane and I'm so excited to be here with my first Creative Team member post on the UK Scrap Addicts blog.  This month we are focusing on layouts using multiple photographs.

All of my scrapbook layouts are 12x12inch pages and a lot of them do contain more than one photograph so when looking at ideas for this month’s blog post I decided to use photos which were taken at the recent www.hugsfornoah.co.uk Gala Dinner which we attended as we have lots of pictures from this event to scrapbook.

I decided to use a double page layout, with multiple photographs on each page but each page has a different photograph layout format...


On the left hand page I have used four photographs which are 4x3inch in size; these have been arranged in a two by two grid format.  The top of the page has the first half of the title and a flair badge embellishment.


The right hand page I have used a photo-strip of four photographs which we received from the photo booth at the event.  This page also has the second half of the title and some journalling about how Noah had chosen what we were to wear for our photographs with embellishments cut from patterned paper and wood veneer pieces.


All scrapbooking materials and products used within this layout are from my stash, some recent and some from 7+ years ago – I love to mix old with new when using stash items rather than a kit as I think it gives a unique feel.

Thank you for visiting and don’t forget to check back regularly for lots of Design Team posts here on our blog and our YouTube channel.

Love Laura Jane Thomson xx


Friday 24 March 2017

Free Cut File | Daffodils


Hello UKSA fans!  Today we have a free cut file for you...


It has been designed by our very own Emma aka Polly's Papercrafts.  Below I have two examples cut, one roughly 16cm tall on plain white and one roughly 22cm tall.  The larger one was cut on white and coloured with spray inks.


Here is a quick run through of downloading the image and turning it in to a cut in Silhouette Studio...


To use this cut file you will need to click on the black and white image to maximise it.  Right click and 'save image as' and give it a name you will remember.  Open up your Silhouette Studio and a blank page.  Drag and drop the image from where it is saved to Silhouette Studio.  Resize if desired, and trace.  If you get unwanted pieces traced right click and release the compound path.  Then select the individual pieces to delete.  Reselect the daffodil and all of its small pieces, right click and make compound path.  Now you can move it around as one piece.  Resize and place on the page where you want it to cut, set the correct settings for your cardstock and cut.

As with all cut files with delicate features the smaller you cut the trickier it will be to get off the cutting mat.  My 16cm cut was clean and easy enough to remove from the mat.

For all those of you who do not have cutting machines, it can be used as a template either for stitching or paper piecing.

If you use it (and we hope you will!) please tag #uksacutfiles when sharing so we can see your creations!

I want to say a huge thank you to all of you have supported UKSA, liked or commented on a post or sent us well wishes.  I'm not sure what I expected when I started this crazy journey, but the response and support has been wonderful!
Laura

Say Cheese! | Lisa-Jane | Multiple Photos

Hello lovelies!  I've been patiently waiting for my turn to share my first layout for UK Scrap Addicts and here we are!  I'm so pleased and honoured to be part of this amazing team promoting UK designers and craft businesses and I hope you are enjoying all the inspiration so far.

So I thought I'd start with a confession...  I can't dismiss photos.  Even when they are virtually identical.  If I take lots of pictures of an event trying to get a handful of good ones, I can never decide which ones to actually print.  So I print them all intending to sift them when I see them in the flesh.  And then I can't...  This means many of my pages need to have room for more than one photo - enter the double page spread!


I get my photos printed in bulk once a month using one of the on-line deals such as Snapfish on Living Social.  This means that prints work out to less than 2p per print including postage so I don't feel like I'm wasting money if I don't end up using the image after all.  I'm teaching myself to be really ruthless with my photos and not try and scrap every single one of them so I quickly write "spare" on the back and then give them to my little girl to scrap or send them to relatives (thanks to the lovely Shimelle Laine for that tip).     However I still end up with far too many pictures of certain events.  I choose some of the best ones to do single pages and tell the bulk of the story and then I squeeze the rest onto either double pages or side by side pages.


With many people using the D Ring scrapbook albums, the layouts don't fit together snugly when you open the pages.  This means that a true double page spread doesn't need to have the lines matching up across the whole format as they tend to be seen more separately by the eye.


While they may not be 12x24 in format, there are a few tricks to help the eyes see them as two parts of one whole.  Here I've used the same papers in similar proportions on both sides and echoed the embellishments just as you would if it was all on the same page.


On the first side I've matted the white die-cut background from my shop onto a thin black cardstock border.  On the facing page I've matted the black patterned paper onto a thin white cardstock background and added the negatives from the die-cuts.


Both pages have very similar clusters of embellishments to draw the eye across the whole 24 inch canvas - enamel dots, bottle top flairs, stickers and a smidge of washi tape.


I really loved using the new Say Cheese III collection from Simple Stories for these pictures of my children playing rugby as they match their strips wonderfully.  There's actually very little in the kits that I can't use because it is too Disney specific, I even managed to use the "Goofy" stickers for these pictures!

Don't forget to add #UKScrapaddicts to any posts on social media if any of our layouts have inspired you - we'd love to see what you've been creating too!

Until my next post, bye for now!
x

Thursday 23 March 2017

Crazy Cousins | Roxy | Multiple Photos

Morning scrap addicts!! I'm Roxy and welcome to my first post and video, as part of the UKSA Creative team! So Exciting! 

When I found out our theme for the month was multiple photos, my heart sank a little. I had only ever scrapped with one photo! How was I going to do this? But in fact, I found it relativitly easy! I decided to use some old photos of myself and my cousins.

I made a 12x12 layout, using 3 2.5x4inch photos. The fact that the photos were small made it easier for me to scrap. I decided that the 'Bloom' collection by Maggie Holmes would be perfect to go with the colours in my photos.


I knew that I didn't have much ephemra left for this collection, so decided to mostly use stickers. I love the dimension that the puffy stickers add. 


I decided that my layout needed some splatters to pull it all together. I chose to use Heidi Swapp colour shine in 'blush'. The perfect colour for the background.


Don't forget to check out the process video over on our Youtube channel!!  


Thanks for reading! Don't forget to check back soon!

Wednesday 22 March 2017

Crazy Hair | Sheena Rowlands | Multiple photos

Hi there x  I'm Sheena & I'm thrilled to be sharing with you today my first post on the UK Scrap Addicts blog featuring multiple photographs.

Honestly when I scrapbook I tend to use 1 or 2 photos on a page, max. So to use multiple photos I chose to print them smaller as not to overpower the layout, using the 4 up option on my Canon Selphy printer. I chose photos which together tell a story I thought was worth recording  These 4 photos were all adhered to white cardstock to give them a photo strip appearance.

Why do I even Bother!!


When I create, my first focus is usually the photographs then I'm guided by the colours as to what ranges and papers I choose. I've used mainly Crate Paper - Maggie Holmes papers across her ranges in this design.


I used my Silhouette Cameo to design and cut my title out of the cardstock. Then I gave my white cardstock a mini mixed media treatment with a little texture paste and light pink watercolour paint first, before finding patterned papers to layer behind my title and photograph.


I created 2 main clusters of embellishments either end of the photo strip adding curved and circular elements  to add to the feeling of the wind blowing my hair. I also added sewing thread to these groups to echo the messy hair feel.


My title was completed with letter stickers & a stamped word before adding a little journalling to finish the page off.
Many thanks for stopping by.
Sheena x


Tuesday 21 March 2017

Park life | Vicci Lou | Multiple photos

Hey hey hey fellow scrappers. Hope that you are all well today! I'm super duper excited to show you my layout on this months theme "multiple photo layouts". Over here on the UKSA blog me and my fellow creative team members have been working uber hard on designing and making layouts with multiple photos to share with you all in the hope that you will enjoy our thoughts and processes but most importantly that you will get some useful tips and inspiration to make your own layouts with multiple photos! I hope to see you all play along! Don't forget to share your projects with us on Instagram #ukscrapaddicts

Anyway, I love using more than one photo in a layout especially when I've had a day out where I've been very photo happy (let's face it we all have them haha) or when I've been to a big life event such as a holiday. For this layout, I decided to scrap a day in the park over the half term with my son and his cousin. 

To get my multiple photos in different sizes, which is how I prefer to do it, I simply used the collage app by Instagram selected my photos and the format and printed them out. 

Here is my final layout.


I used a mixture of Alex by Bella Boulevard and Cool Kid by Crate Paper. I quickly decided that I would like to have a film strip as an element to put some of my photos on. That's where I had to get inventive, I mounted my photos on to white card stock and cut a small border. I then stuck them onto some black paper and trimmed it to the size I wanted my film strip to be. Now, of course, film strips have holes in them running all the way down both sides so for that I took my single hole punch and punched out the circles all along both edges. It took me some time but I'm really happy with the result and it was a great way to get the bulk of my photos in one place and make them into their own element.


Next, I decided that I would need to incorporate some more black onto the layout so I opted to mat the larger 2 photos onto black cardstock to bring it all together. My latest obsession is large photo mats. Mostly because I really struggle covering up the pretty pattern papers (I'm sure I'm not the only one haha). Once I had all my photos in place I choose my title and adhered that down with some extra PVA style sticky glue just to make sure they stay stuck to my page for years to come.

Next, it was time for the really fun part, embellishing! I've done my embellishments in a diagonal because I have to scrap around my large photo cluster but the large piece that says "wild child" was just too big to be next to my photos. However, I then needed to balance that with an embellishment cluster at the bottom of the age so that it felt balanced and cohesive. In order to make all my embellishments feel connected, I used similar things for all 3 areas. And I used the paper that is like a banner behind my photo as a chevron pattern for both the top and bottom cluster simply by following the pattern already provided and cutting it up. I added a star and a circle to the top and bottom of my page allowing the circles to run off the edge slightly in order to make it feel a bit more framed. Finally, I finished it off with a couple of asterisks stamped in black (Another recent obsession of mine, haha).


All in all, I'm pretty in love with this layout. I really enjoy making the most of the supplies I have in hand and getting creative with the pattern paper to create little bits of embellishments using my punches. I think it's a great way to stretch your supplies but also a thrifty way to work as you don't have to buy all of the embellishments in a set!

Thank you very much for reading and don't forget to check back every day for more inspiration, hints and tips and even the odd discussion on a variety of different topics!

Much love, until next time!
xoxo